· DNS & Domains · 2 min read
How to manage DNS records
Learn how to view and edit DNS records for your domain in DirectAdmin, including A, CNAME, MX, and TXT records.
DNS records control how your domain connects to servers and services. Whether you need to point your domain to a new server, set up email, or verify ownership for external services, managing DNS records is a key skill for any website owner.
Prerequisite: You need an active web hosting plan with DuelHost.
Step-by-step guide
Step 1: Log in to DirectAdmin
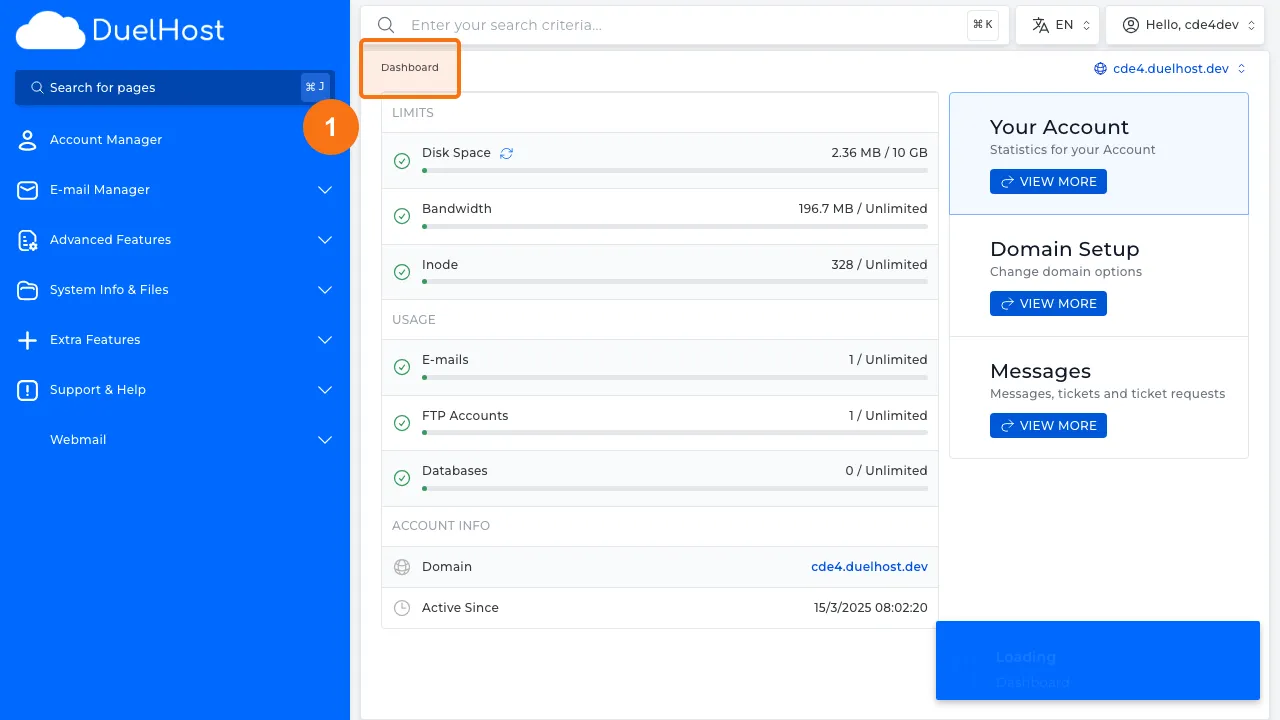
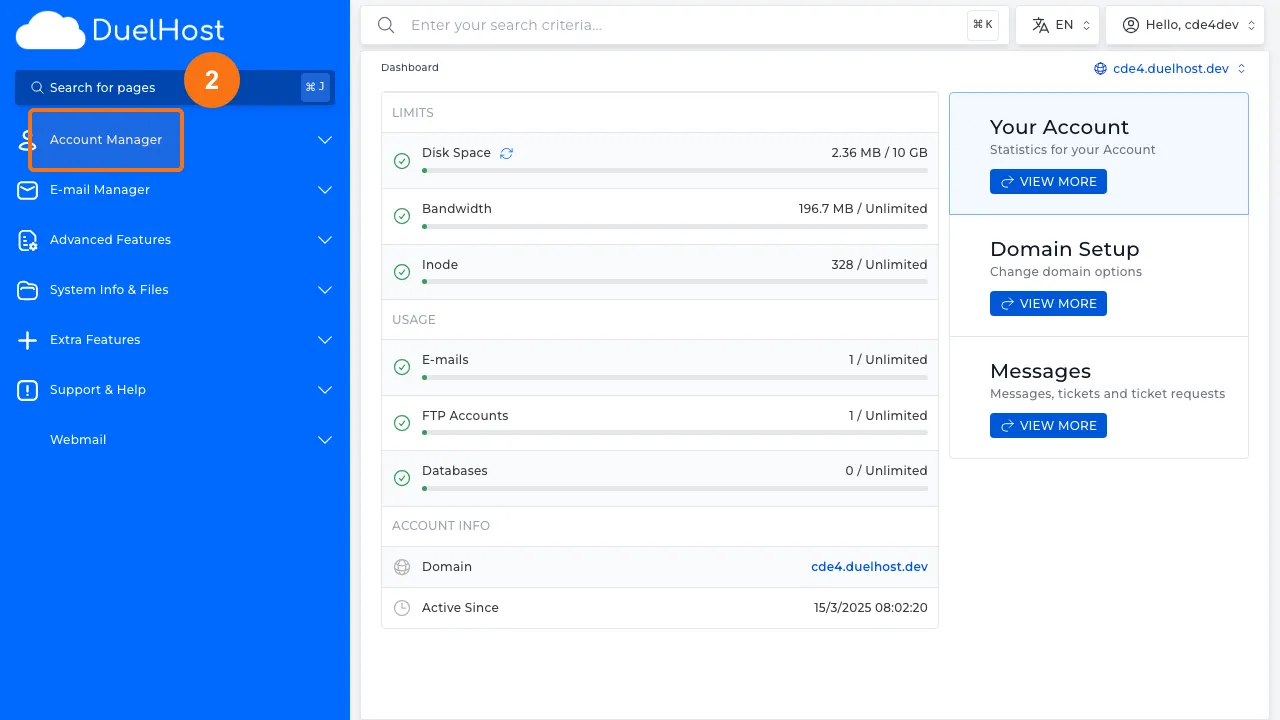
Step 2: Click “Account Manager” in the sidebar
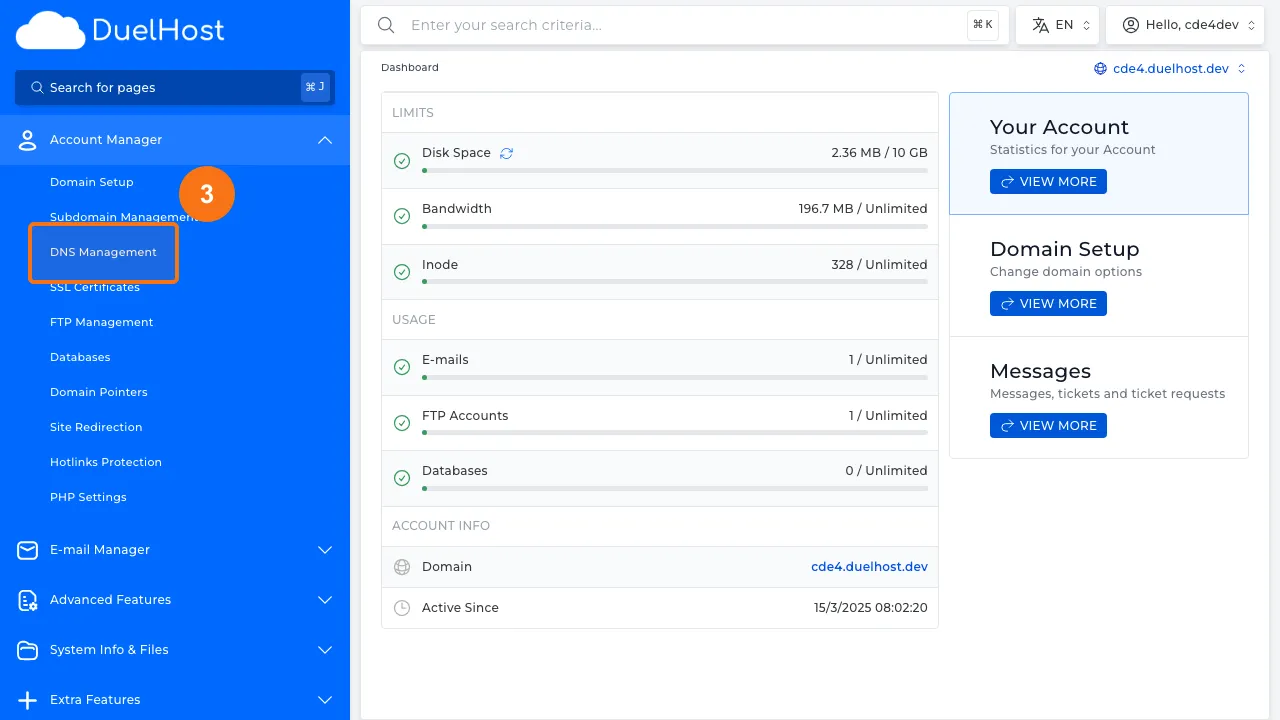
Step 3: Click “DNS Management”
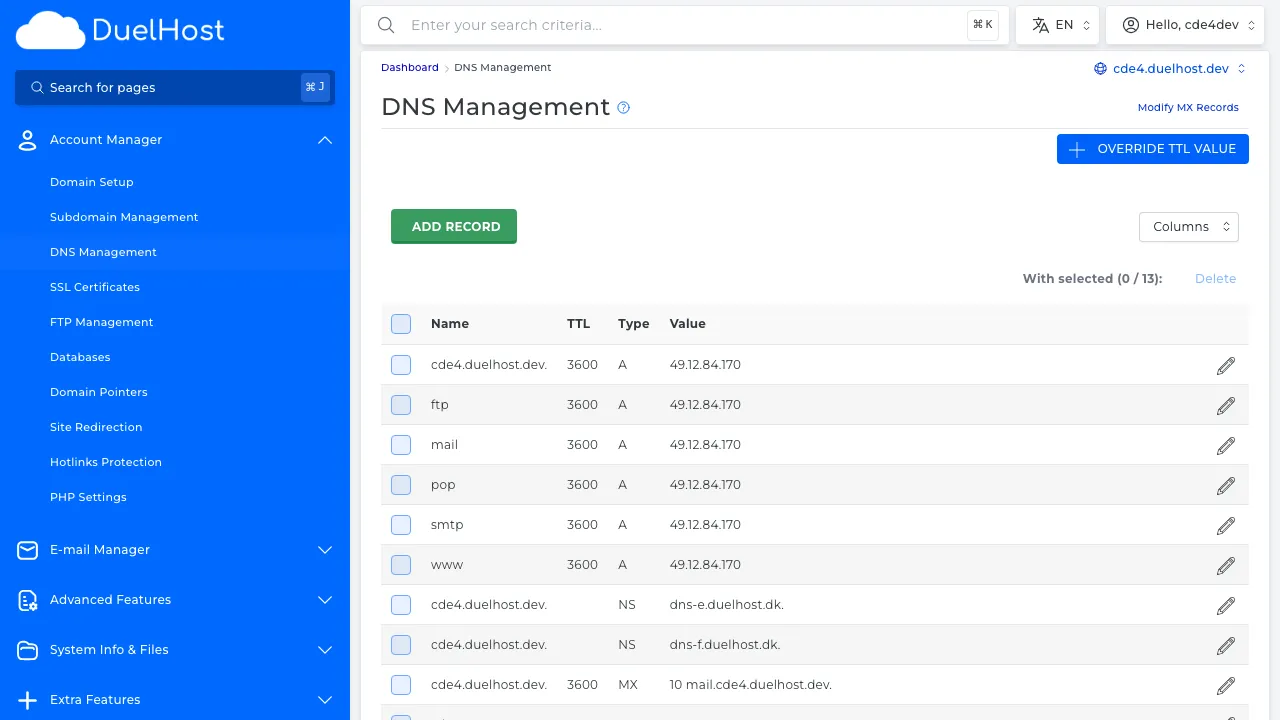
Step 4: View the list of existing DNS records
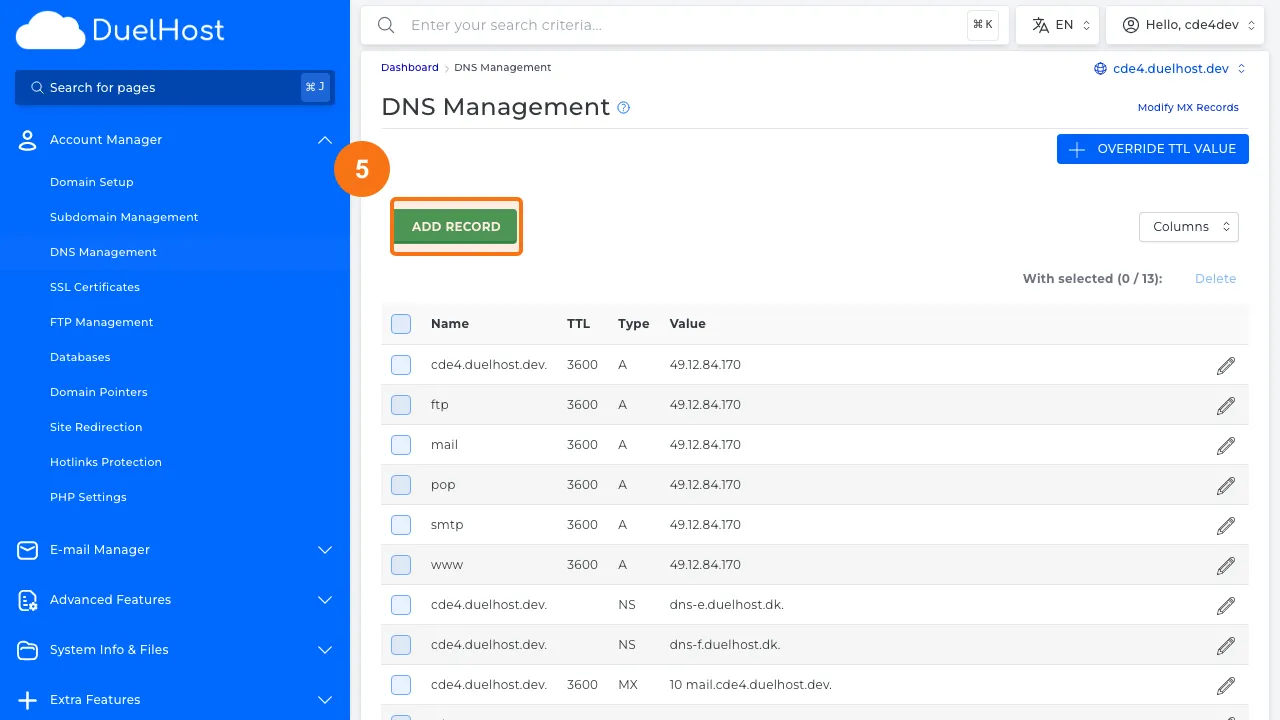
Step 5: Click “ADD RECORD” to open the form
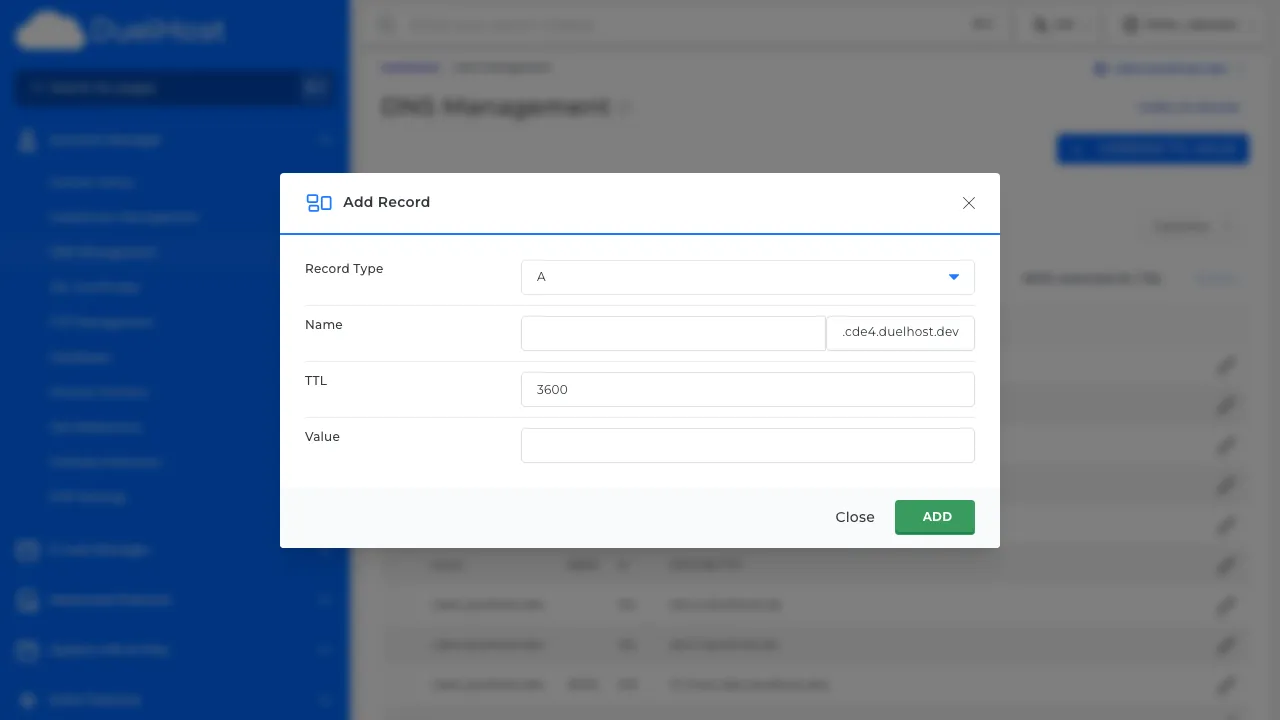
Step 6: View the form — select the record type (A, CNAME, MX, TXT), fill in the name and value, then click ‘ADD’ to add
Tips and notes
- Always double-check record values before saving changes
- DNS changes can take up to 24-48 hours to propagate
- Be careful when editing MX records, as incorrect values can break email delivery
- Use a DNS checker tool to verify your records are propagating correctly
Need help?
If you run into any issues, our support team is ready to help. Contact us at support@duelhost.dk or through our contact form.
Del: